Announcement

Collapse
No announcement yet.

Power Wagon mud race truck build

Collapse
X
 
  • Filter
  • Time
  • Show
Clear All
new posts

  • #16
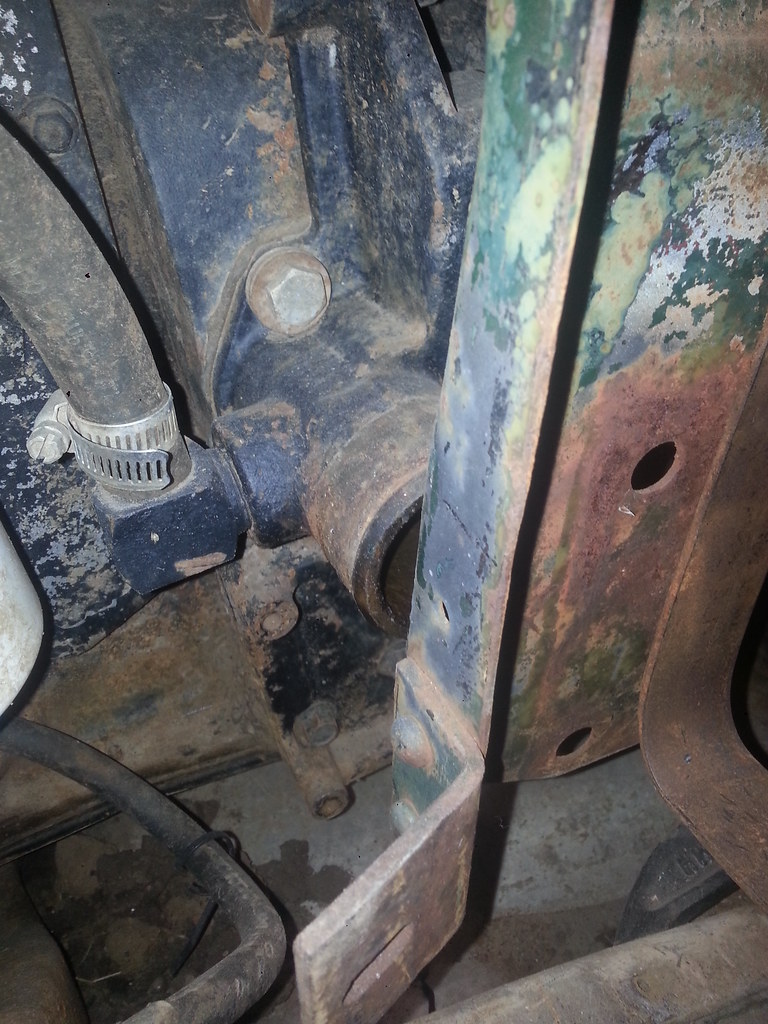
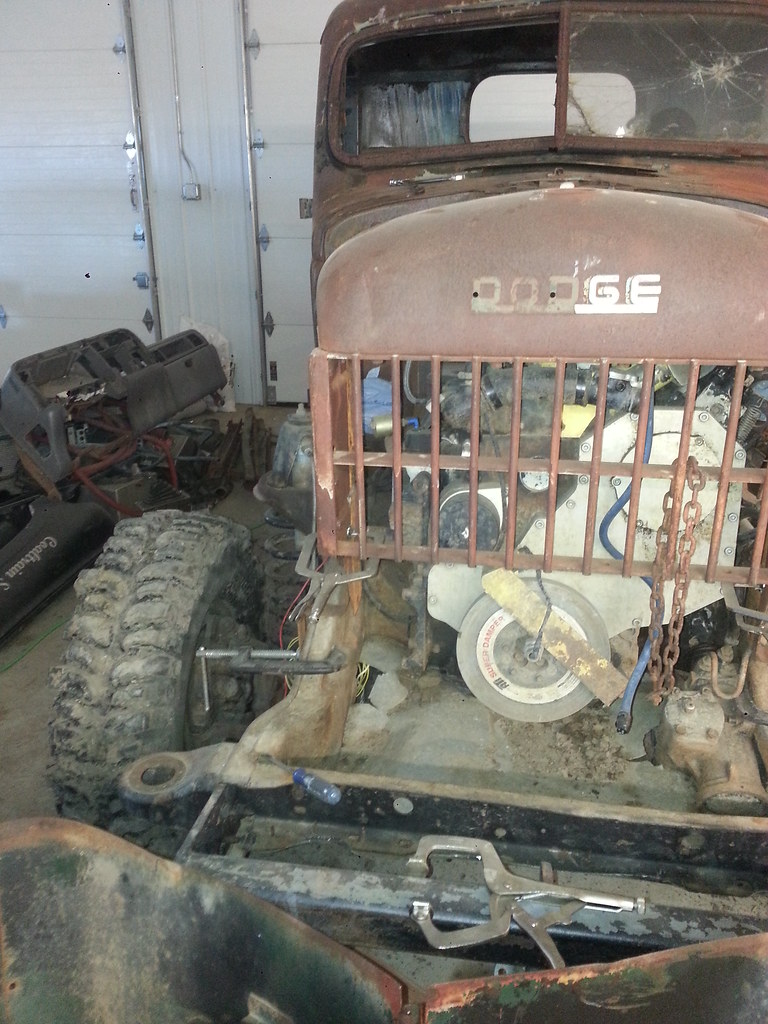
    radiator support rod dimensions

    Rod flattened for 1.5 inches with hole for bolt approx. 0.5" from radiator end.

    rod threaded for approx. 2.5 inches on cowl end

    total length of rod 29.5 inches.

    Comment


    • #17
      Thanks, I appreciate it.

      Comment


      • #18
        Been tasked to make a cedar chest for someone for Xmas, so progress on the truck has been a little slow to my liking, but I've picked up some steel this week and started making the upper support rods and the back front fender brace I was missing using the one I have as a template. I'll post some pics up when I get them finished.

        Comment


        • #19
          Worked a little on the truck today while waiting on things on the cedar chest to dry.
          Removed the front window crank, ended up cutting the heads off the screws that held it onto the window channel and will drill and tap them once I get the windshield removed. The upper screws on the top are pretty rusted as well, hoping I can get them freed soon.

          Removed the old seat base structure today by cutting all the welds with my handy spot weld cutter bar I bought to use on my Camaro.

          I also started trying to figure out the seat height and how far in they needed to be placed. It was fun trying to crawl up in there with nothing to grab and the seat precariously balanced.

          Comment


          • #20
            I have found a few issues that I'm going to have to figure things out on. In the following picture you can just barely see the turbo sticking out past the cab edge when it's aligned with the front grill. I'd originally thought I could work around that on the hood, but the fender hits into it as well.

            After testing fit of the bars connecting the cab to the grill, no problems on the drivers side, but again the turbo is in the way on the passenger side.
            I'm going to have to figure something out on the turbo, either change my steed speed manifold from a straight exit to a 45 degree up or down or build a spacer to move the turbo up or down. I'm going to pull it off till I get everything else figured out.

            The water neck on the 6bt is in the way as well, I'm trying to track down an inlet with a 90 built into it or I'll cut it apart and weld a 90 onto it. to get it to clear. I need it pointed to the back of the truck.

            Comment


            • #21
              The lines for the power steering sector are in the way as well with the way they are bent. I'm going to have to get new lines made anyway because I'm changing the truck to hydroboost off of a newer dodge truck, so the lines will be figured out later. with sharp 90's towards the back of the truck.

              Anyway, some progress and some more stuff to figure out. Challenge accepted....

              Comment


              • #22
                Talked to a friend today that built my engine for the race truck, talking about some options on turbo placement and we think we found a solution that might work. I'm going to try it tomorrow hopefully, but I'm basically just going to turn the turbo 180 degree where the fresh air is on the back and the exhaust out is on the front, I'm hoping that will relocate stuff enough to clear the fender, hood and the support rod. Then if that works, I'll have to decide if I'm going to stay in class 2 where I have to run the exhaust out to the bed and have a stack (additional weight) or if I move up to class 3 and run a short little hood stack.

                I found one option for the water neck...


                Still looking around to see what other configurations I can find from the different 3.9 and 5.9 cummins applications.

                Been thinking on colors for the truck too, I'm tired of the flat black I had the truck with the 96's body, I plan on painting the fenders black along with the frame being black.

                For the cab and bed I'm either looking at this color (electric yellow)


                or this color plum loco purple:

                Comment


                • #23
                  I don't know what class 2 and 3 means.
                  Power Wagon Advertiser monthly magazine, editor & publisher.


                  Why is it that the inside of old truck cabs smell so good?

                  Comment


                  • #24
                    The organization I race with breaks the trucks and modifications allowed up into classes/tire sizes. Class 1 is called street, you are very limited on what you can do and must pull 17 inches of vacuum for gas engines. Class 2 is modified street. It allows body swaps up to 37" dot tires, pull 14 inches vacuum for gas engines, but no exhaust through the hood. Class 3 is Super Street, no vacuum limits, exhaust through the hood is allowed, etc... the trucks progressively get faster as you go up in classes. My brother has a class 4 truck with a little over 1000 hp and they go up from there to class 7 where the rails run.

                    I've raced classes 2 and 3 for the last 3 years and run for the season points trophy. I've taken 2nd for 3 years in a row in class 2 and 1st and a 2nd in points for class 3 over the last 2 years. My truck is pretty consistent and usually I place pretty well.

                    Comment


                    • #25
                      The use of idle vacuum as a guide is interesting. I can see why, as it allows a measure of cam specs.
                      Power Wagon Advertiser monthly magazine, editor & publisher.


                      Why is it that the inside of old truck cabs smell so good?

                      Comment


                      • #26
                        Yes, that is how they limit big cams in those classes for the gas trucks. Diesels don't have to pass the vacuum test, but we are limited in class 1 to single turbos and no power adders, and class 2 by single turbos. I'm the only diesel running, so we have been working on the rules for the diesels as we go.

                        We do get a lot of people whining about my truck since I have a turbo and don't have to pass the vacuum rules, but it's not like I blow the class away with the truck. At one race, I ran a 3.99 second pass in the pit, the next truck ran a 4.00 and the truck after that ran a 4.07 and we all got beat by a truck that ran a 3.65.

                        I guess the head guy with the org got calls the day I blew my turbo and caught the truck on fire, complaining that I was going to put a bigger turbo on my truck. I did of course, why would I go with the same turbo I'd been running, but there isn't a size limit on turbo's just has to be an OEM part. Not my fault the engine maker makes some huge diesel engines with massive turbo's

                        I went from a Borg Warner s366 with billet wheels to a stock s475 that pushes about 100lbs of air a minute

                        Comment


                        • #27
                          I found the water neck in Michigan for 21.00 + shipping, it's used but I don't care, they wanted 50 to 60.00 else where.


                          I'm going to plug that outside port and use the bottom port for my coolant bypass to the back of the block.

                          Comment


                          • #28
                            Went out to the shop a bit ago to turn on some heat to warm it up a tad from the 49 degrees inside and pulled the turbo while I was out there. I flipped it and looks like that is going to solve a couple of problems


                            Exhaust would have to be a tight 180 to get it to the rear along the frame. I'll figure that out when I get there.

                            Comment


                            • #29
                              Finished up the support rods today, need to pick up some bolts for the front grill and nuts for the back.
                              Also threw the doors on it and used some pole barn nails for the hinge pins to see how they fit.

                              Comment


                              • #30
                                Very cool project!

                                Keep the pics coming.

                                Thanks.

                                Comment

                                Working...
                                X